
Say that blog title 3 times fast!
This post is about a little DIY project that was small but mighty. During one of our frequent trips to Home Depot I snatched up the latest issue of Better Homes and Garden's "100 Decorating Ideas." I really love their special editions and succumb to paying nearly $6 a pop for them. With every issue there are things I like and others I could do without. However, this certain magazine had an article with a project I just had to try!
This post is about a little DIY project that was small but mighty. During one of our frequent trips to Home Depot I snatched up the latest issue of Better Homes and Garden's "100 Decorating Ideas." I really love their special editions and succumb to paying nearly $6 a pop for them. With every issue there are things I like and others I could do without. However, this certain magazine had an article with a project I just had to try!


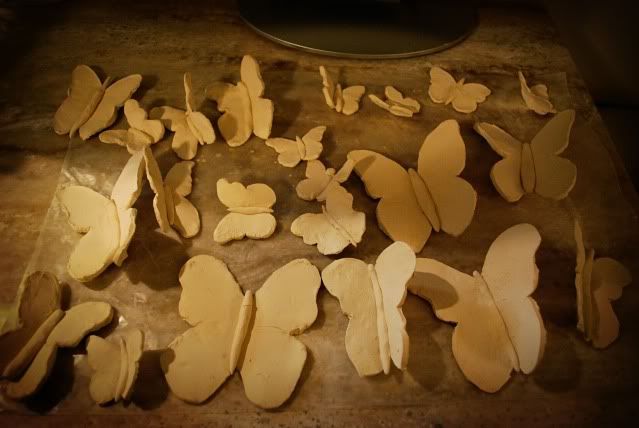
Because of this article in the magazine, I was inspired to make my own 3D wall art in the shape of butterflies! All it took was a couple of cheapie supplies {wax paper,rolling pin, razor blade, white clay, spray paint, butterfly inspiration art, foam stickies},a patient hand, and some serious practice makes perfect.


Once they were all shaped and formed, I let them dry for a couple of hours since the cheapie clay I bought had strict instructions NOT to bake it.


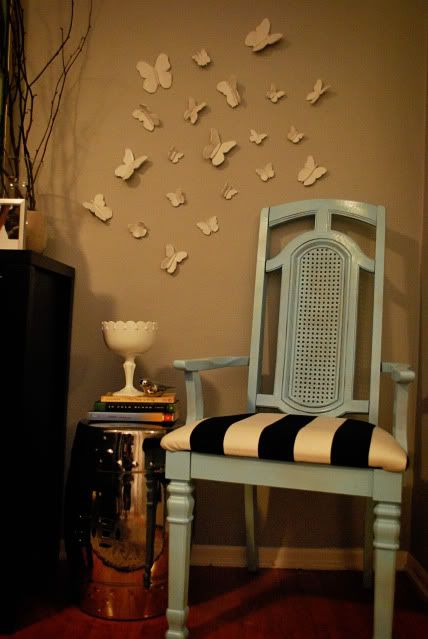
Before I put them on the wall all willy-nilly, I did take a picture of a layout I liked and referred back to it as I placed them on the wall, making some minor tweaks here and there.

It took about an hour to hang all of them because I would hang one, step back and look, hang another, then crack one {oops!}. When a crack occurred, I solved it super quick with clear liquid nails. There's no job too big or small for that stuff! I'm happy to say that only one butterfly was beyond repair after I cracked it!
And, finally, the finished product both far and close.

Hope you enjoyed my little DIY wall art fun!
xoxo
{Stay tuned for a post on those fun ceiling medallions!}
And, finally, the finished product both far and close.
xoxo
{Stay tuned for a post on those fun ceiling medallions!}
24 comments:
I just wrote about my wallflowers yesterday. One of the things I didn't like about them was how they felt a little cheap. I love yours butterflies!
I am in love with those! What a cool idea!
What an amazing idea! I would have never of thought of that. We have this really awkward place in our master that is a huge space and I need some relatively inexpensive to fill it. I am now inspired so thank you!
Amazing!!! I have the flowers on my bedroom wall...now it looks like I will have to try these too for another room. Love it!!! And love the living room!!!
Beautiful header ! Oh WOW, this is a great post & you have the most gorgeously beautiful site here. I had to stop by to leave this comment for you – and to say hello of course ! Your posts are creative and original and you have interesting pictures. It's all perfect ! Thank you for sharing your site and best wishes... Happy weekend....
Fantastic!
Those are so cutesy!
Joi, what a great detail! It looks beautiful!
Oh my God....I am in love with this and will promptly steal it as soon as I get a free minute!!!
Very sweet Mrs. Crafty! =) They are perfect in that spot.
Girl, you are on a roll w/ all of your fabulous rooms and creations.
I am seething w/ jealousy over here. Which is driving me to drink even more wine than usual. =]
So cute, go you!
Great job! This is a great DIY project and so pretty! I love that you came up with a creative way to make them yourself.
Roeshel
This would be tons of fun to do in my daughter's room. Thanks for sharing!
Love those! I am going to have to try that one very soon!
What a great project! I am a sucker for those BHG special issues as well. They always have so many good ideas and inspiring pictures. Thanks for sharing!
Oh wow, you have left me no choice but to do something similar at my place. so wonderful!
I LOVE these and have put this idea into my "to do" file...just in case I ever have a baby girl, I would love these up the wall over the crib...thanks for the great idea! And I LOVE your photography...beautiful!
Dang - I love it! I would love to do something like that in our sunroom - {bookmarked}
How cute. I've been on a 'butterfly wall art' kick lately. This is definitely a cool rendition.
Those butterflies look adorable. I moving to my new flat next month and was looking for something interesting to decorate my hallway. I hope mine will turn out nearly as good as yours.
Great idea!
Super cute! I am going to do it at home. I made clay beads for my christmas tree one year. I never used them because I wanted to have them fired. If you fired your butterflies would they not be more sturdy and look even more professional? I think you have the makings of a beautiful business! You should consider it!
I really like this idea. It is perfect for adding the touchs of "girl" that I am looking to add to my daughters room.
Good one, please enable pin it from pinterest.
Post a Comment